


Creating a simple AWS Lambda function with .NET Core 6 runtime using Visual Studio IDE


In this blog, let's look at how to get started with creating a serverless function(AWS Lambda) using .NET Core 6
What we're going to do?
- Create a Lambda function using Visual Studio
- Push the function to AWS Lambda
- Identify different ways to test the function
Pre-Requisites:
- Visual Studio 2022 Community Edition
- AWS Toolkit for Visual Studio - For communicating with AWS resources using Visual Studio
Let's GO!
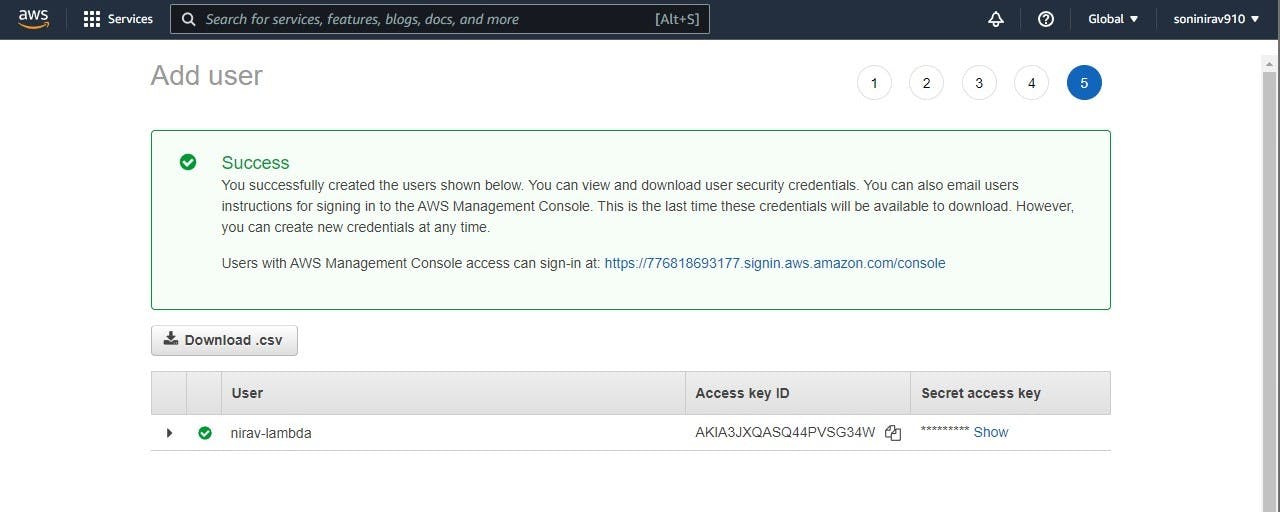
- Creating IAM User
For allowing Visual studio to talk with our AWS account, we need to create an IAM User who has Programmatic access enabled. Plus, the user needs to have relevant permissions required to create/publish AWS Lambda function. For the sake of simplicity, we can assign AWS Administrator Access but ideally in PROD workloads, we will always see the "Principle of Least Privilege" being followed.
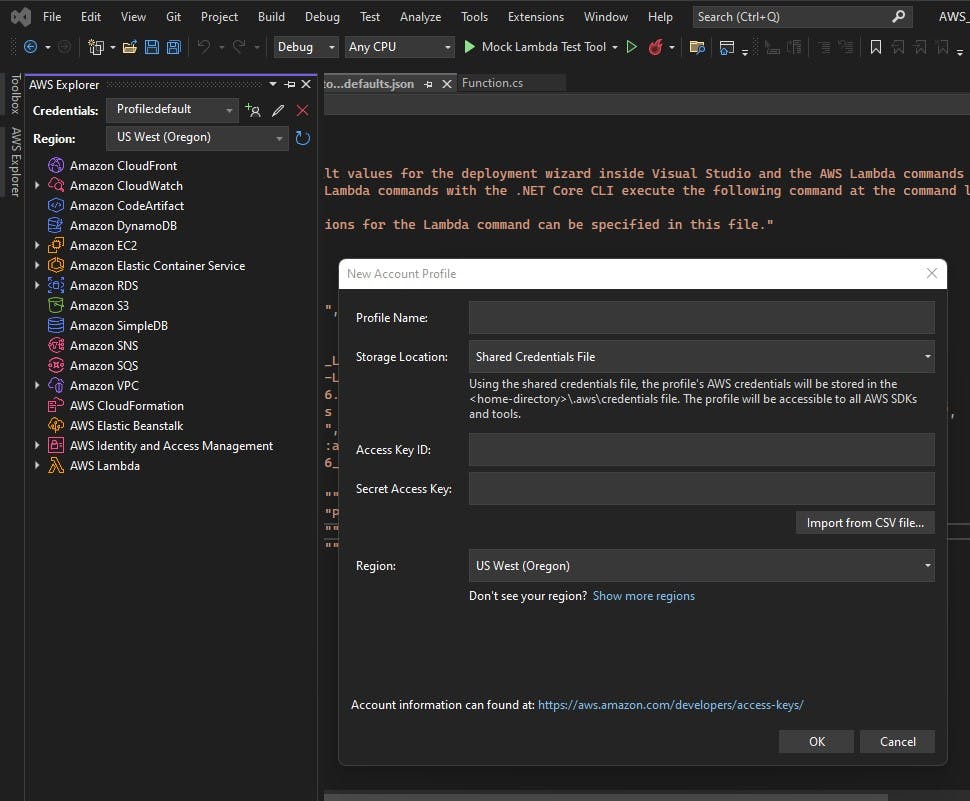
- Setting up AWS Profile on Visual Studio
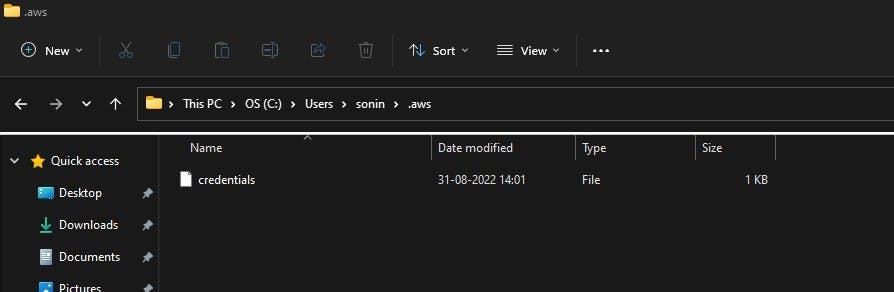
Under View > We will find AWS Explorer. At the top of the panel, we will see an option to configure the credential details. Select the credentials from IAM screen and make sure to choose an appropriate AWS region. Upon saving the credentials will be updated and the details will be saved to the configuration file.
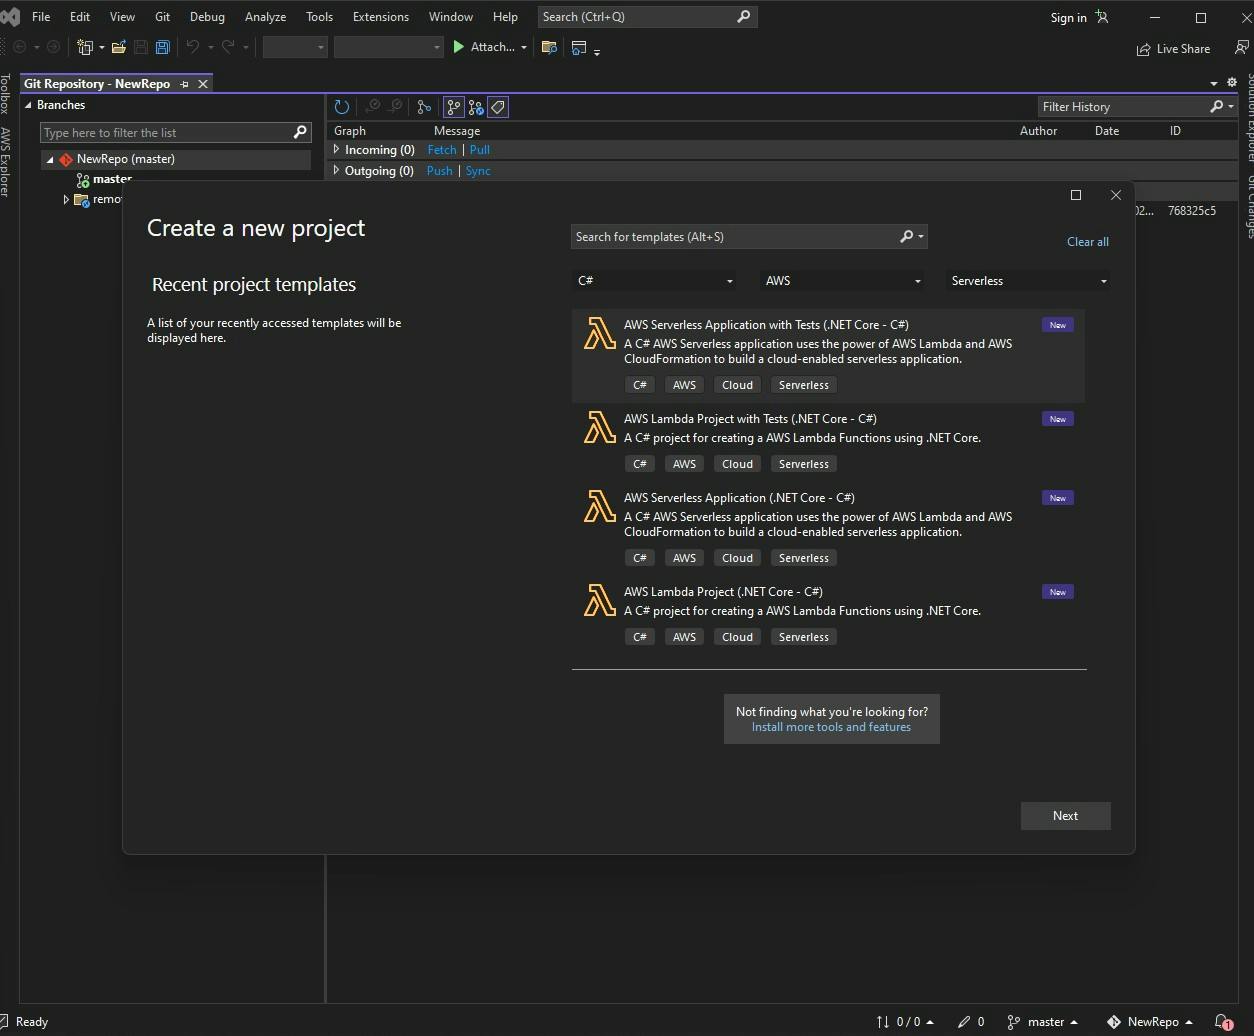
- Creating a new project
Create a new project and from the templates, search for AWS Lambda Project(Use filters)
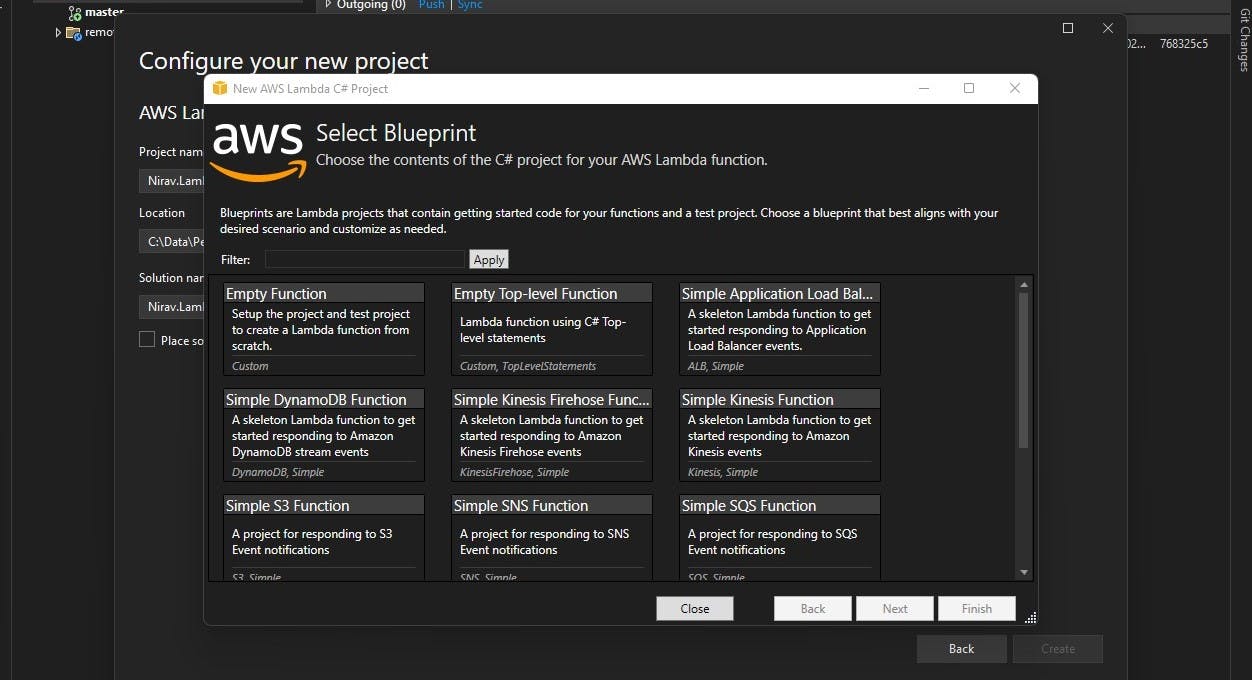
- Selecting Blueprint
Much as the option from AWS Console, here as well, we get the option to use pre-defined blueprints. These are base implementations we can leverage if we have requirements similar to what's being implemented in them. For now, select an Empty function since we want to see the execution from the scratch
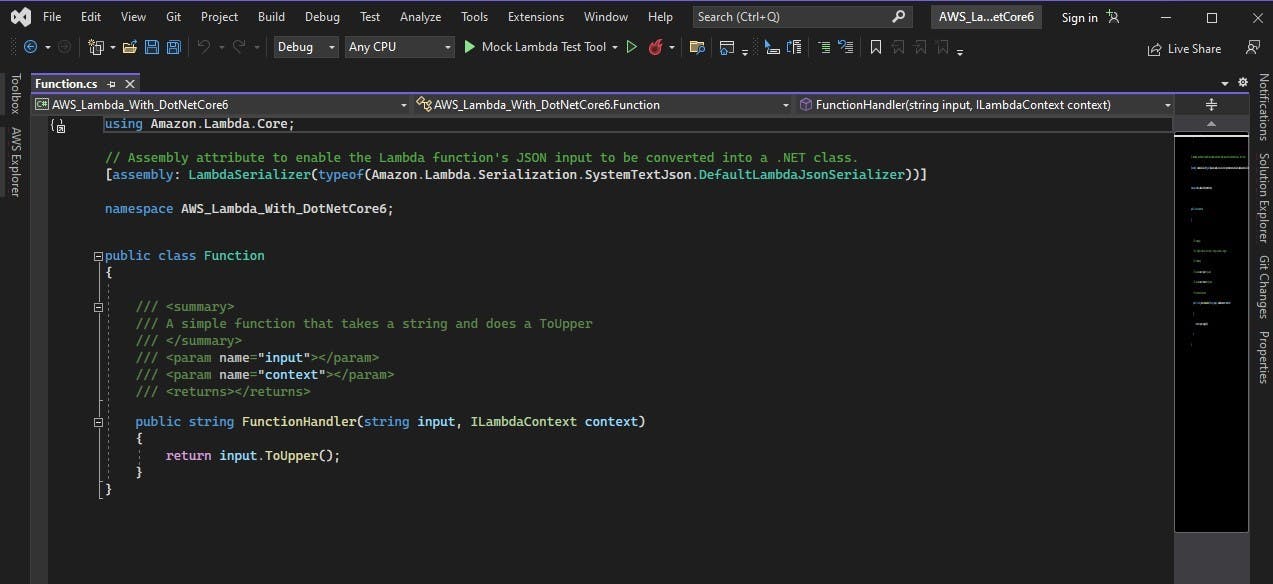
- Function.cs
This is the main file where we will see the function. The default function takes in input as a string and returns it back by converting it to upper case.
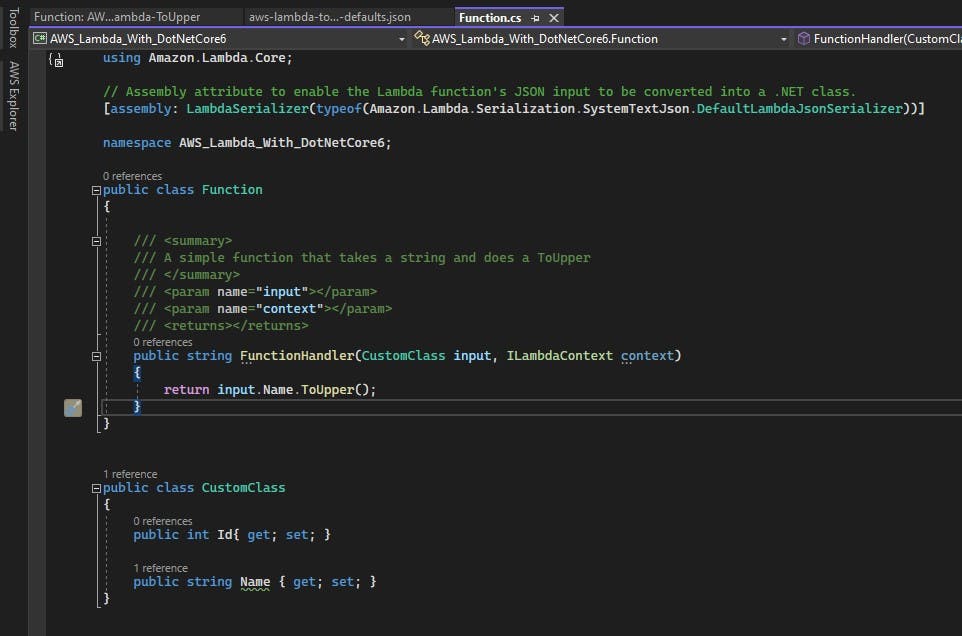
- Modifying the function to accept a custom class
Let's make a change to the function.cs file. We'll add a custom class with Id and Name properties and apply .ToUpper() to the Name property and return it back from the function
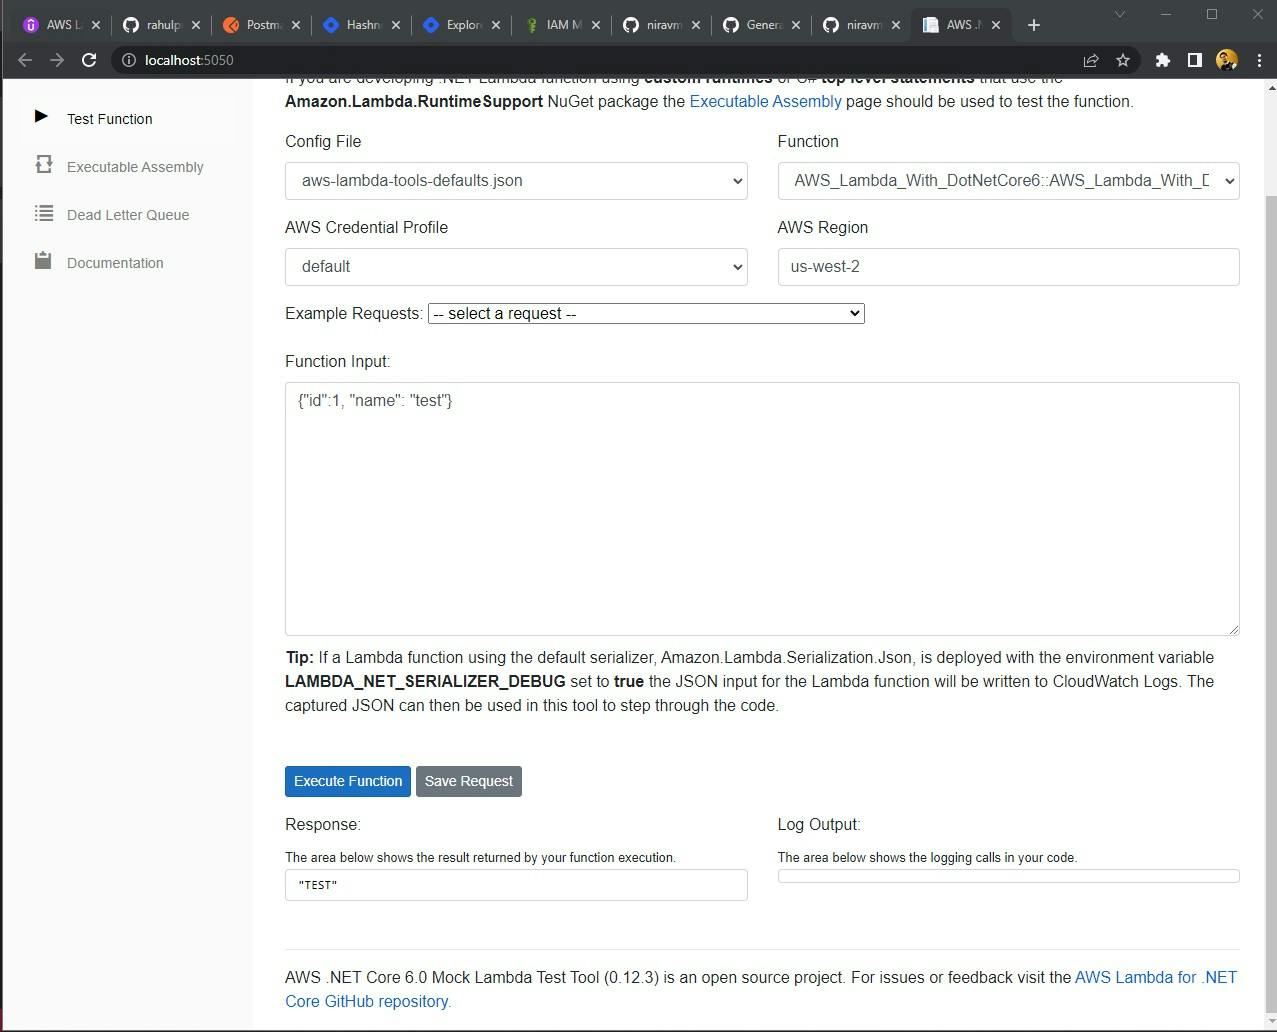
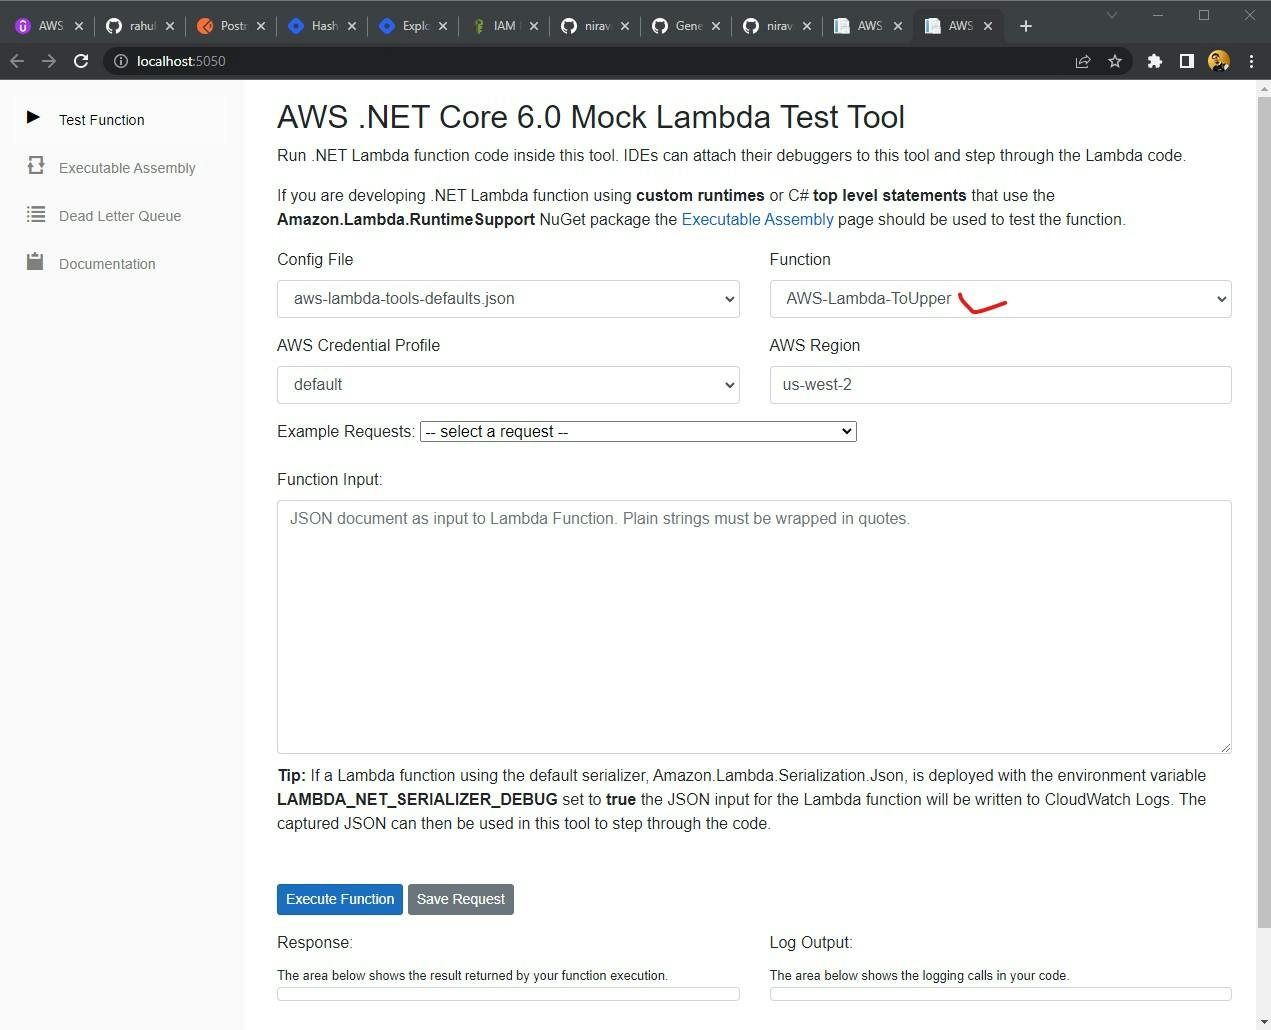
- Local testing using Visual Studio
As a part of this step as soon as we click on "Mock Lambda Test Tool", we will be able to run the function locally
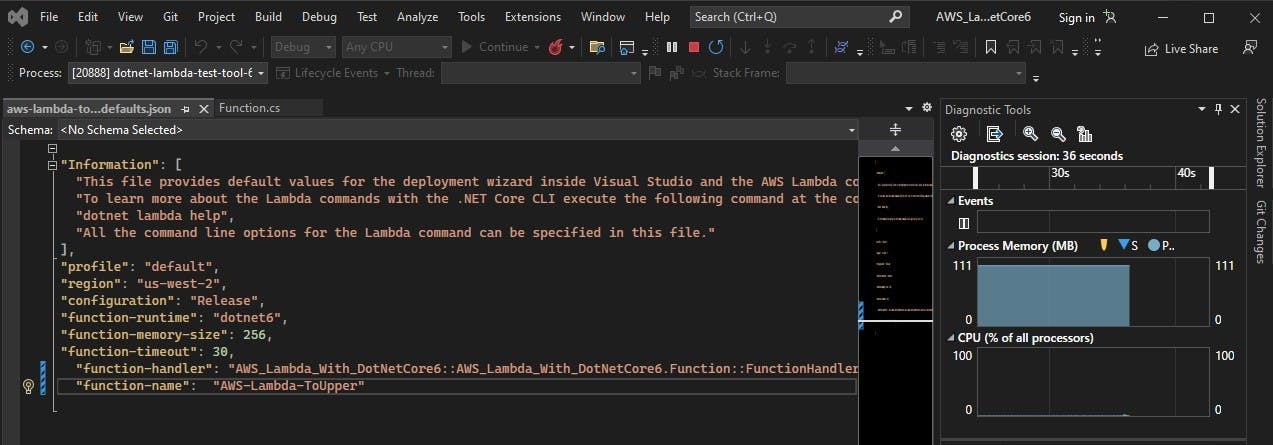
- Giving a custom function name
By default, the function name is of the format "assembly::type::method". We can modify and give it a custom name by editing the "aws-lambda-tools-defaults.json" file
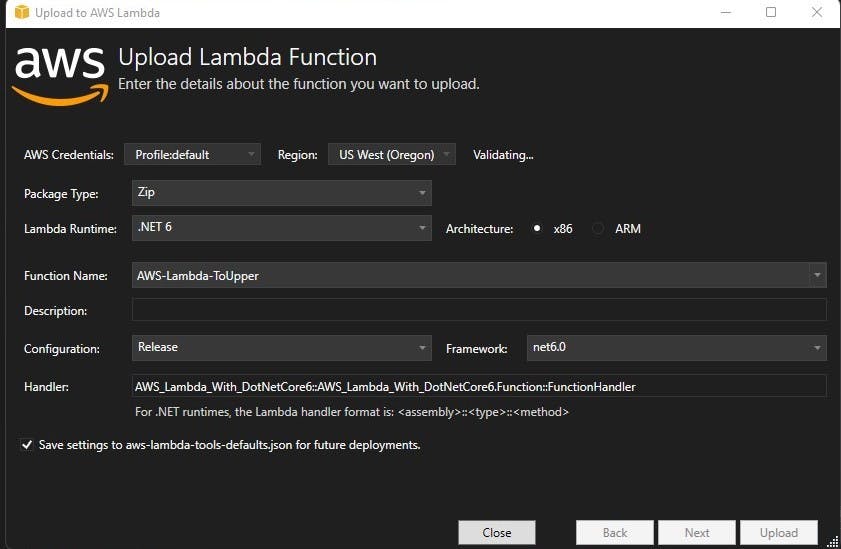
- Uploading the function to AWS
Finally, its time to upload our function to AWS. Right click on the Project file > Select "Publish to AWS Lambda". Upon selecting that, we will see a modal popup opening up. It would have taken the details from the "aws-lambda-tools-defaults.json" file. However, we can modify it if need be.
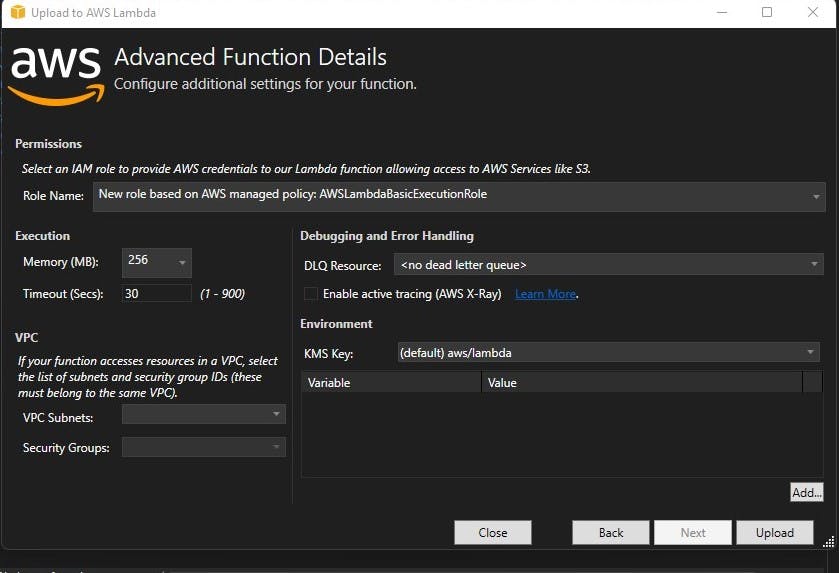
- Advanced Function Details
Under this screen, we can provide the function details such as IAM Role, Memory, Timeout, VPC, DLQ. Environment variables etc.
Role Name - This is the role the Lambda function will assume when created. We need to select the appropriate roles for function to execute seamlessly. For now, since our lambda does not talk with any other AWS services, assigned "AWSLambdaBasicExecutionRole "which just has access to CloudWatch for dumping the logs.
Execution - Here, we need to provide the memory and Timeout we want our function to have.
VPC - If we want our function to be deployed in any custom VPC/Subnet combination, we can provide the information here
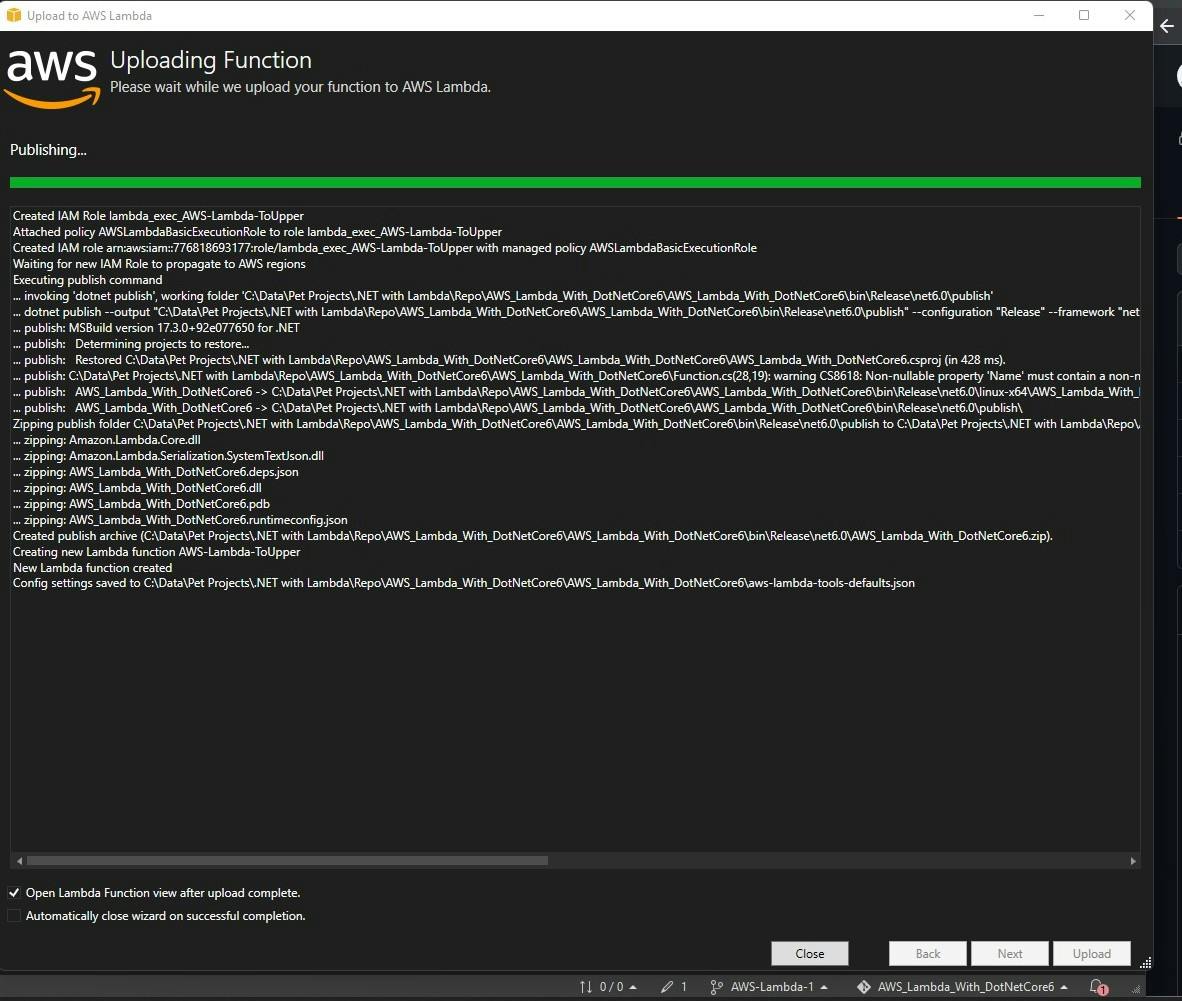
- Publish
Upon hitting the publish function, Visual studio will start uploading the function to AWS Lambda. It will create IAM Role, attach policy, propagate the IAM role to our designated AWS region, execute the publish command by hitting creating a .zip file and uploading it.
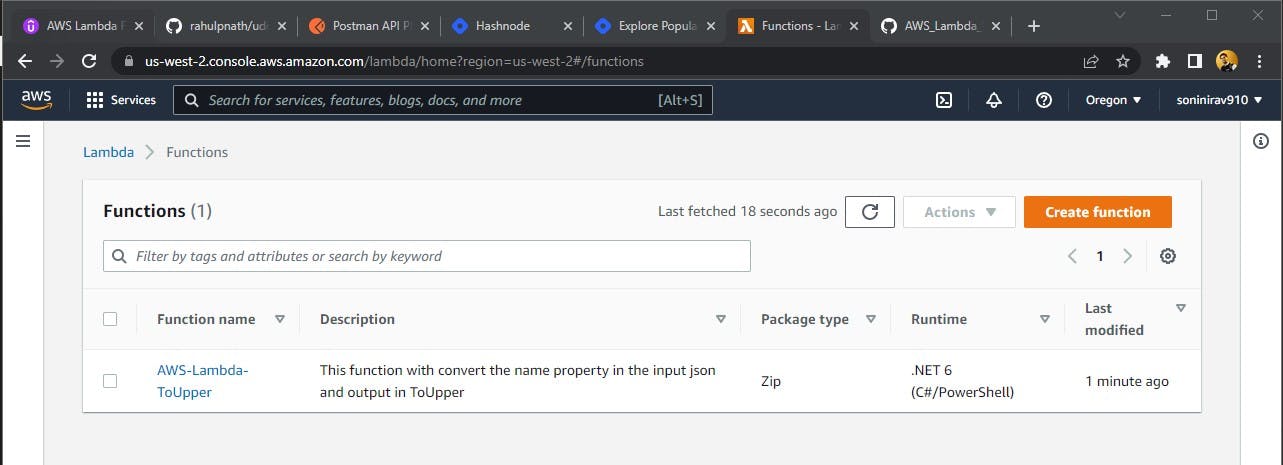
- Verifying on AWS Console
Once done, we can check on the AWS Lambda where we will now see our function successfully created and ready to go!
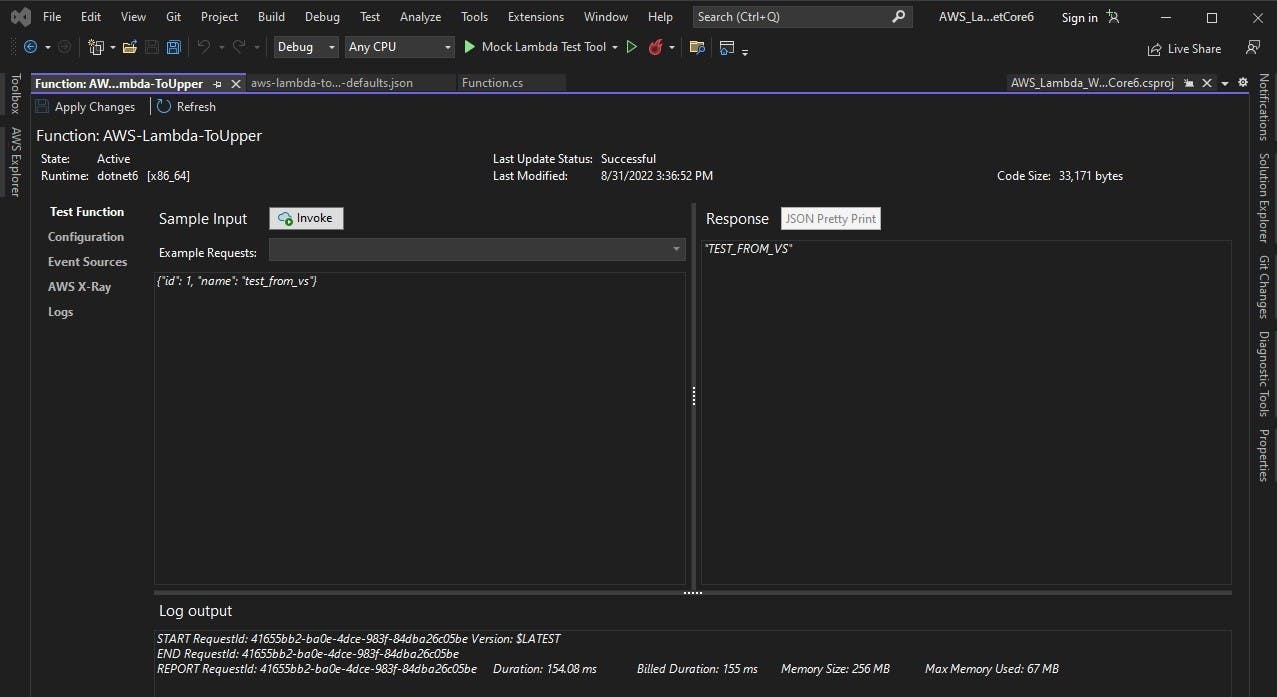
- Testing the function from Visual Studio
Once upload is complete, we can even test the function from Visual Studio
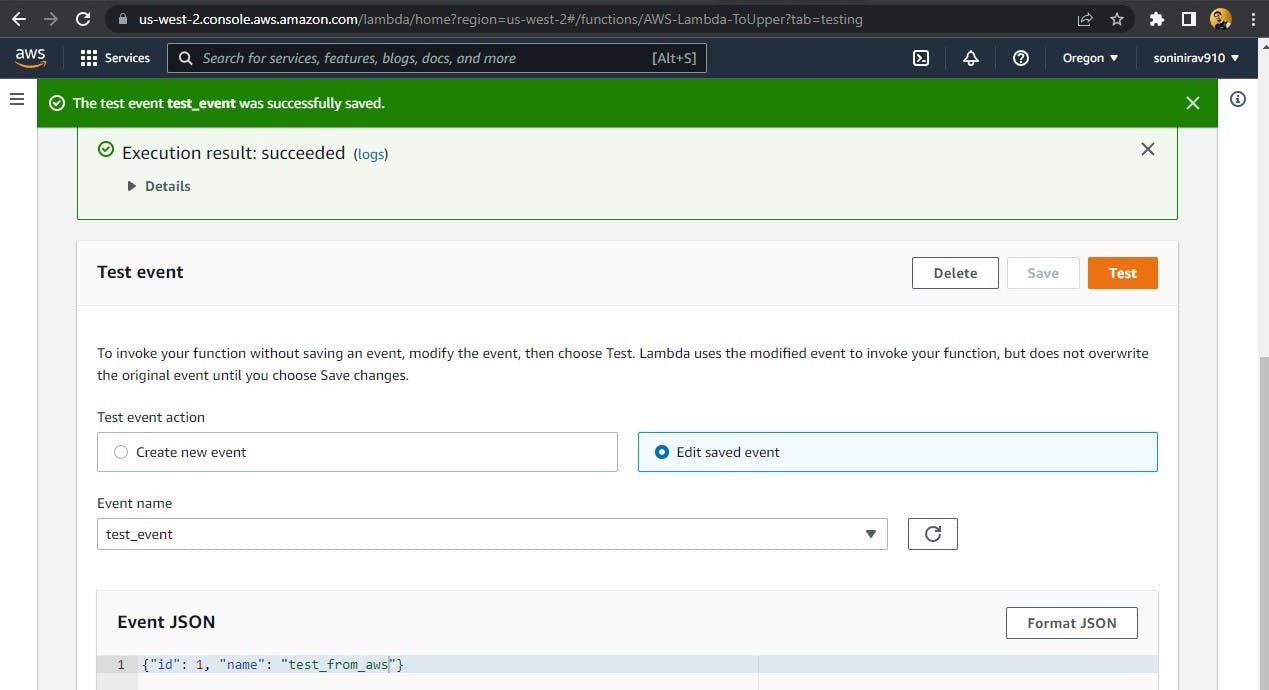
- Testing the function from AWS Management Console
We can even perform the testing from AWS Lambda console by creating a test event like this
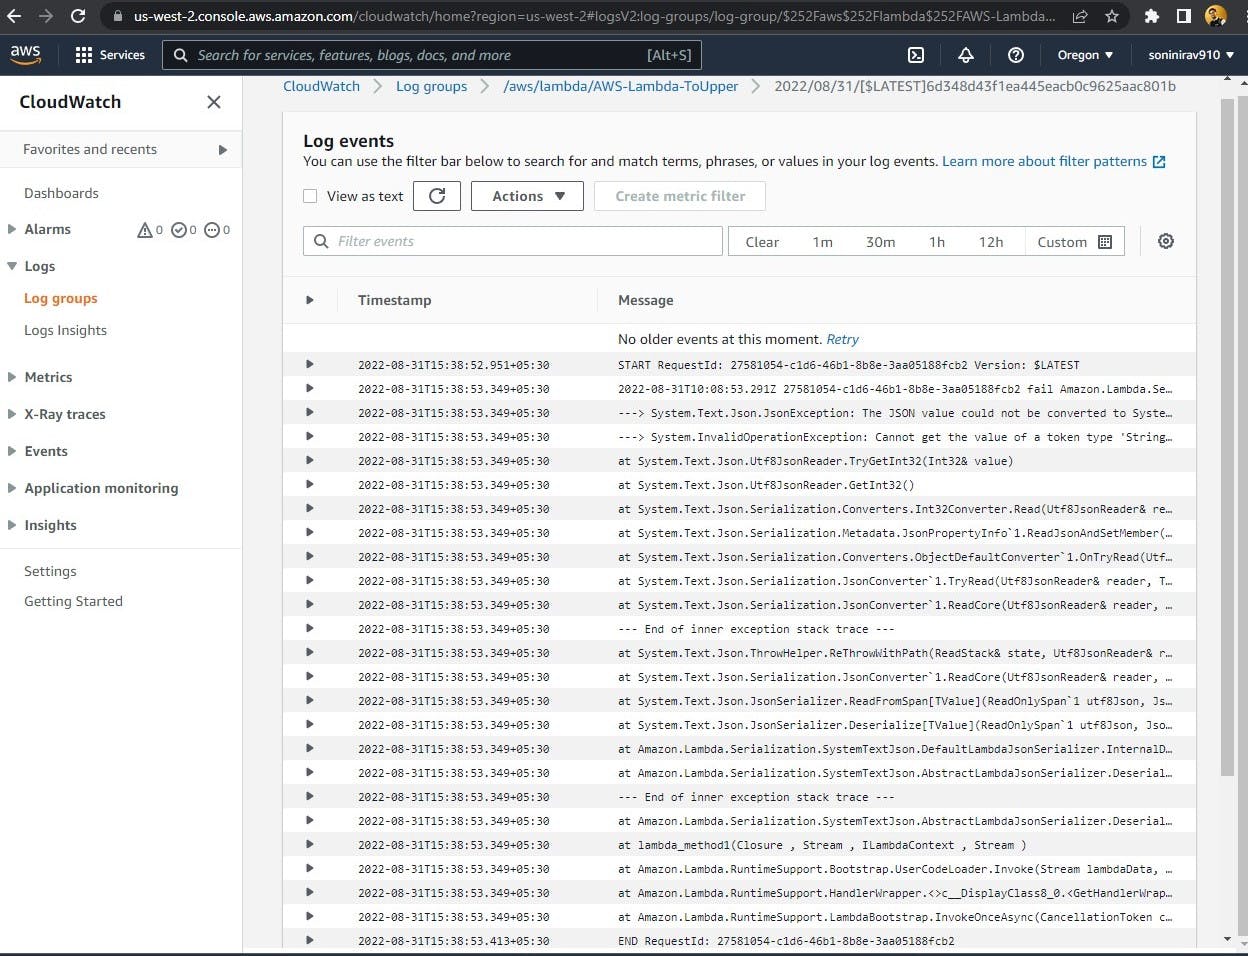
- Logs on Cloudwatch
If you recall, we did provide "AWSLambdaBasicExecutionRole" to our Lambda function. Using that role, we can allow our AWS Lambda function to push the logs to CloudWatch. We can navigate to CloudWatch and see the logs flowing through successfully.
And we're done :)
You can find the code here